Team Accounts
Team Accounts allow you to consolidate billing, share resources, and manage multiple team members under a single workspace. This feature is currently in Beta and available exclusively to paid plan subscribers.
Overview
When you create a Team Account, you'll be able to:
Manage shared resources across your team
Reduce subscription costs with discounted rates
Consolidate billing into a single invoice
Control access and permissions for team members
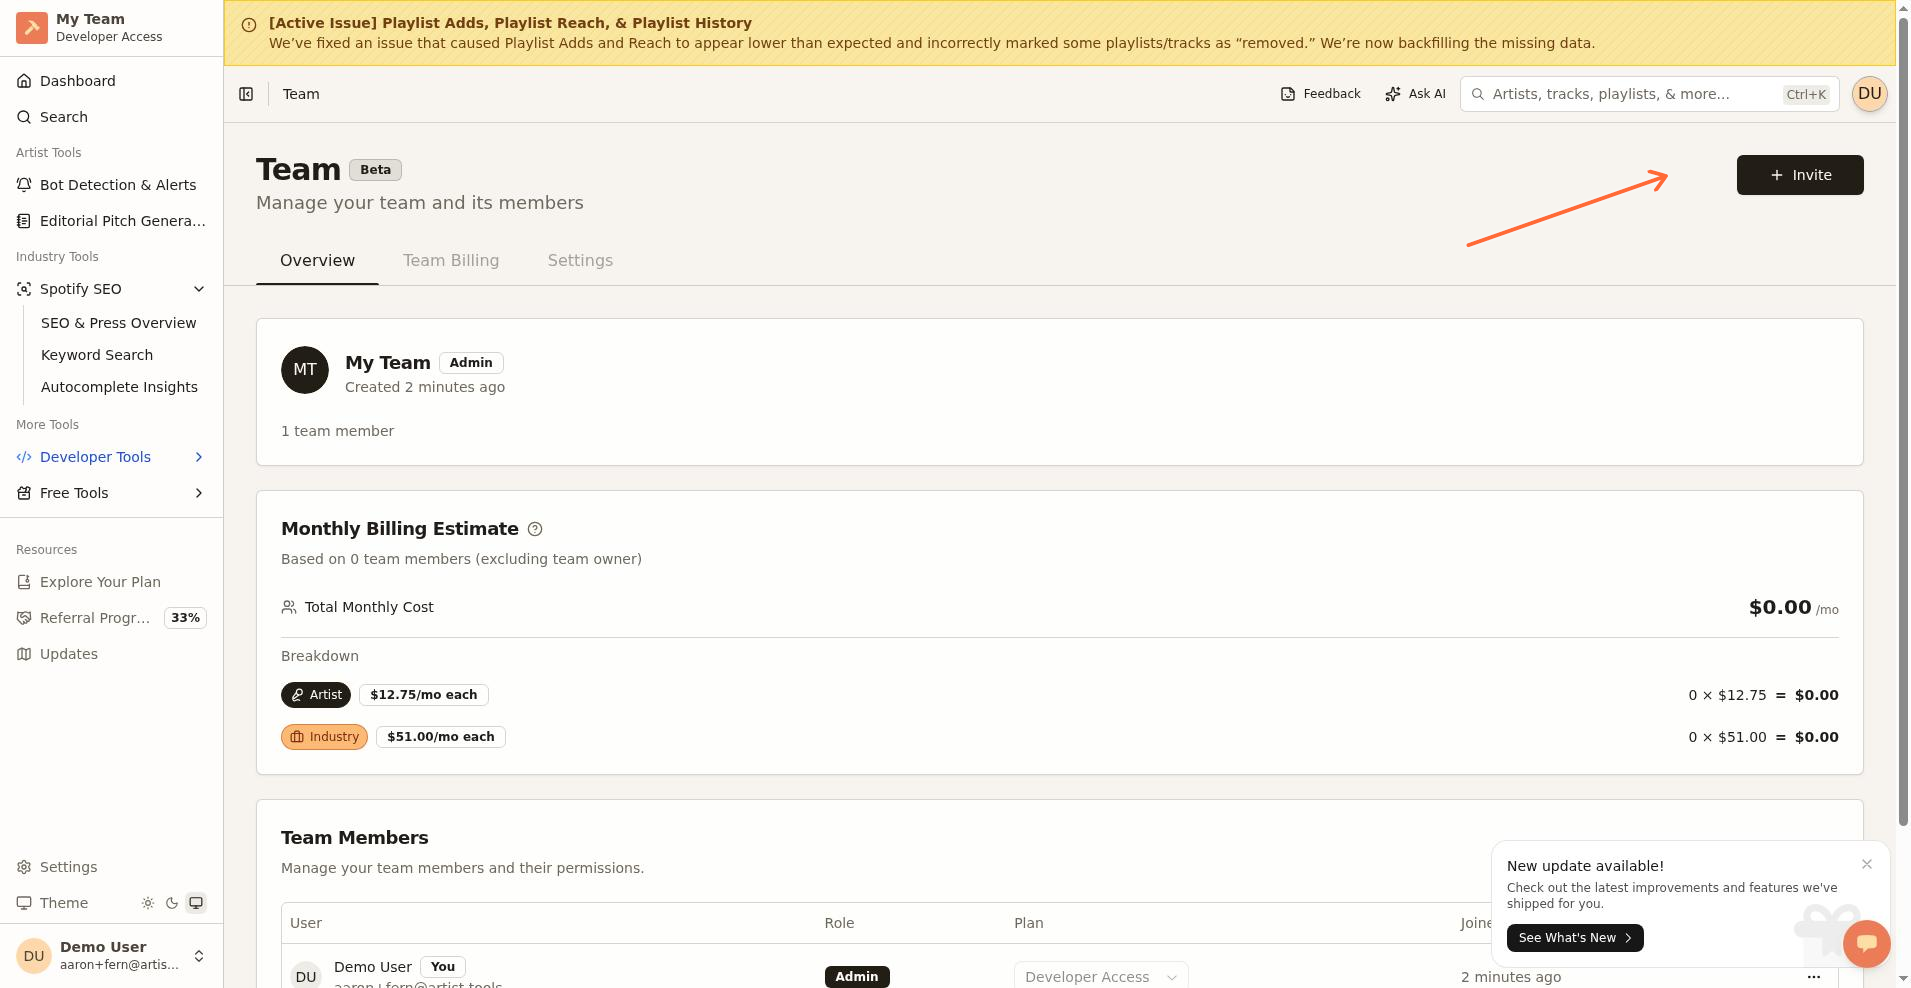
The Team dashboard is at /settings/teams. The page title is Team with the description Manage your team and its members and a Beta badge.
Prerequisites
Before creating a Team Account, you'll need:
Paid plan – Only users on a paid plan can create teams
Valid payment method – A Stripe payment method must be set up to create and manage teams
Admin permissions – Team creation and management are restricted to team owners and administrators
Creating Your First Team
To create a new team:
Navigate to Settings from your user menu or sidebar
Select Team from the settings menu (you'll see a Beta badge)
Fill in the Team Name field in the Create a Team form
Click the Create Team button
Complete the Stripe payment method setup when redirected
You'll be returned to the Teams dashboard with a success banner and an Invite Members button
Understanding Billing and Customers
When you create a team, a completely separate Stripe customer account is created for the team. Your individual customer account and team customer account are entirely separate entities with their own billing settings, payment methods, and invoice history.
How Billing Works for Teams
Team Owner/Creator: Sets up a new payment method specifically for the team. This payment method is charged for all team member subscriptions.
Team Members: When someone joins your team, their existing individual subscription is automatically canceled and prorated. They'll receive a credit for any unused time.
Consolidated Billing: All team member subscriptions appear as a single consolidated invoice each billing period.
Discounted Rates: Team members receive a 15% discount:
Artist Access: $12.75/month per seat
Industry Access: $51.00/month per seat
Inviting Team Members
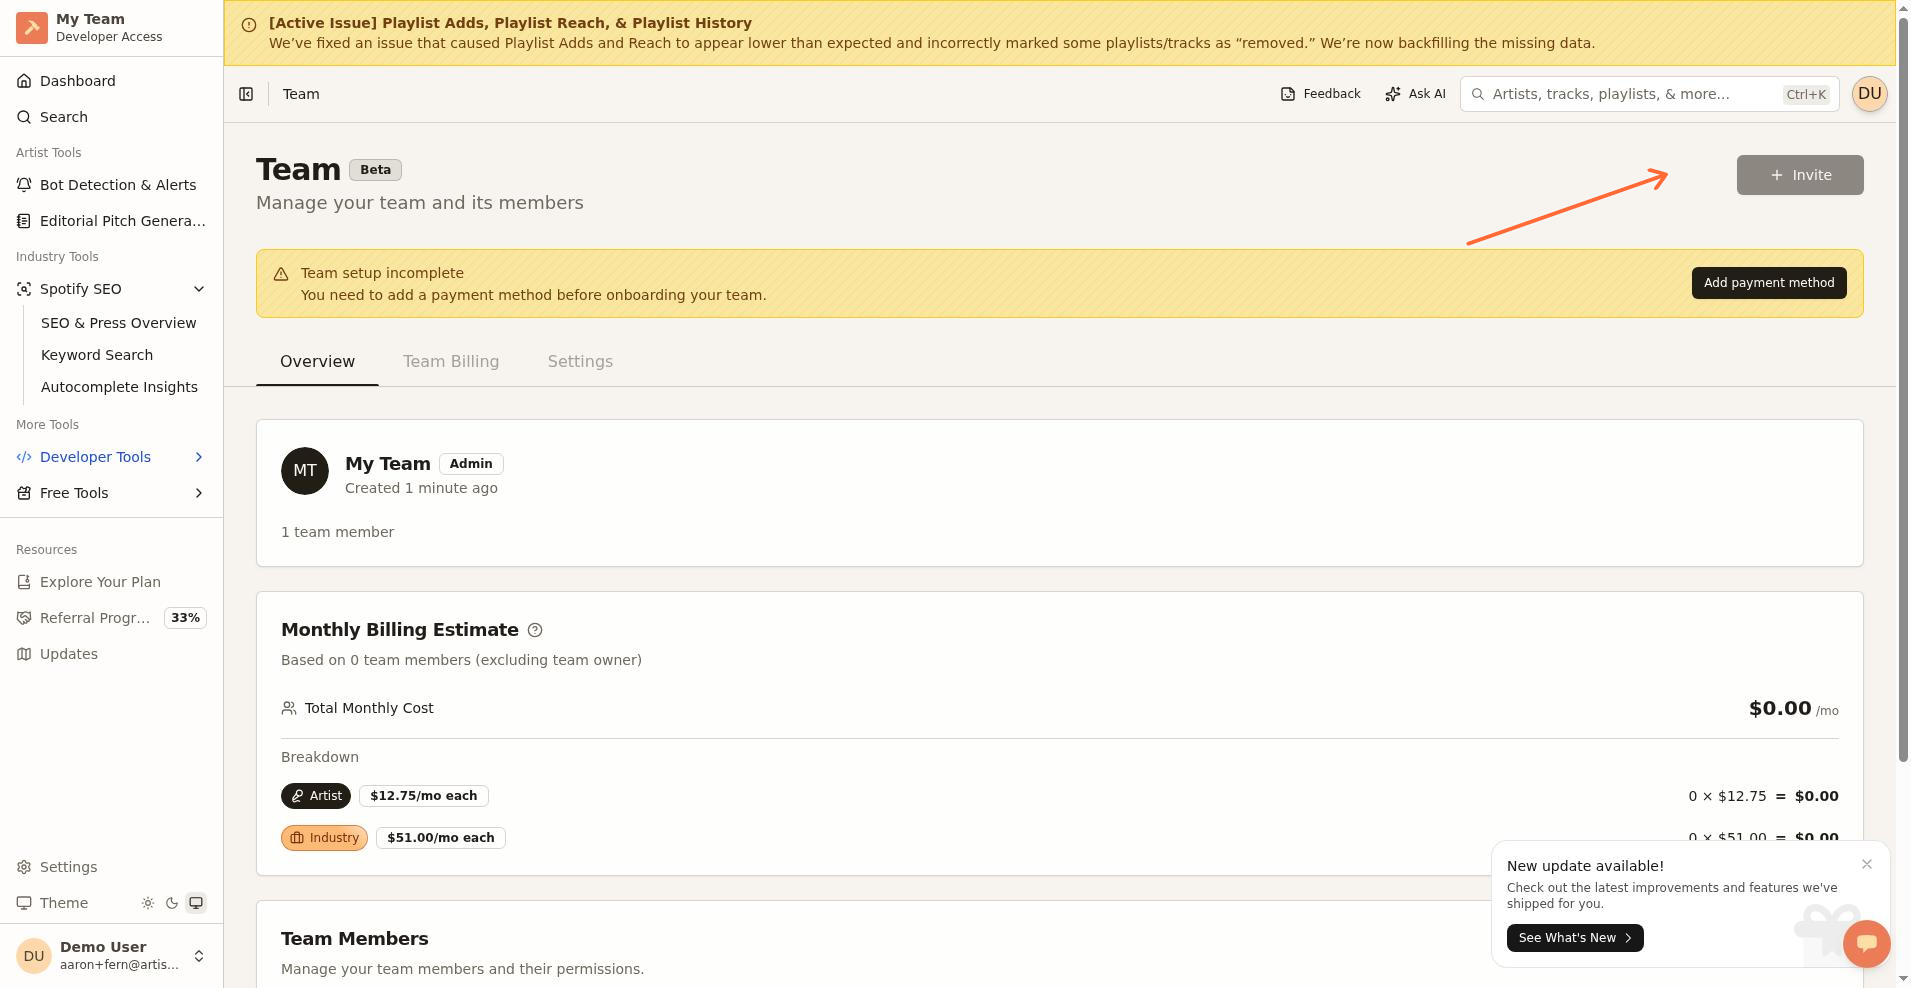
Only team owners and administrators can send invitations. The Invite button is in the top-right corner of the Teams dashboard. If payment issues exist, the tooltip shows You need to resolve payment issues before inviting members.
See Invite team members to your team for a step-by-step guide.
Accepting an Invitation
When someone receives a team invitation, they can join by clicking the invitation link, logging in, reviewing the invitation details on the Team Invitation page, and clicking Join Team. See Join a team from an invitation for details.
Managing Your Team
The Teams dashboard provides different views depending on your role.
Overview Tab
All team members can view the Overview tab, which displays:
Team Card – Shows the team name and total member count
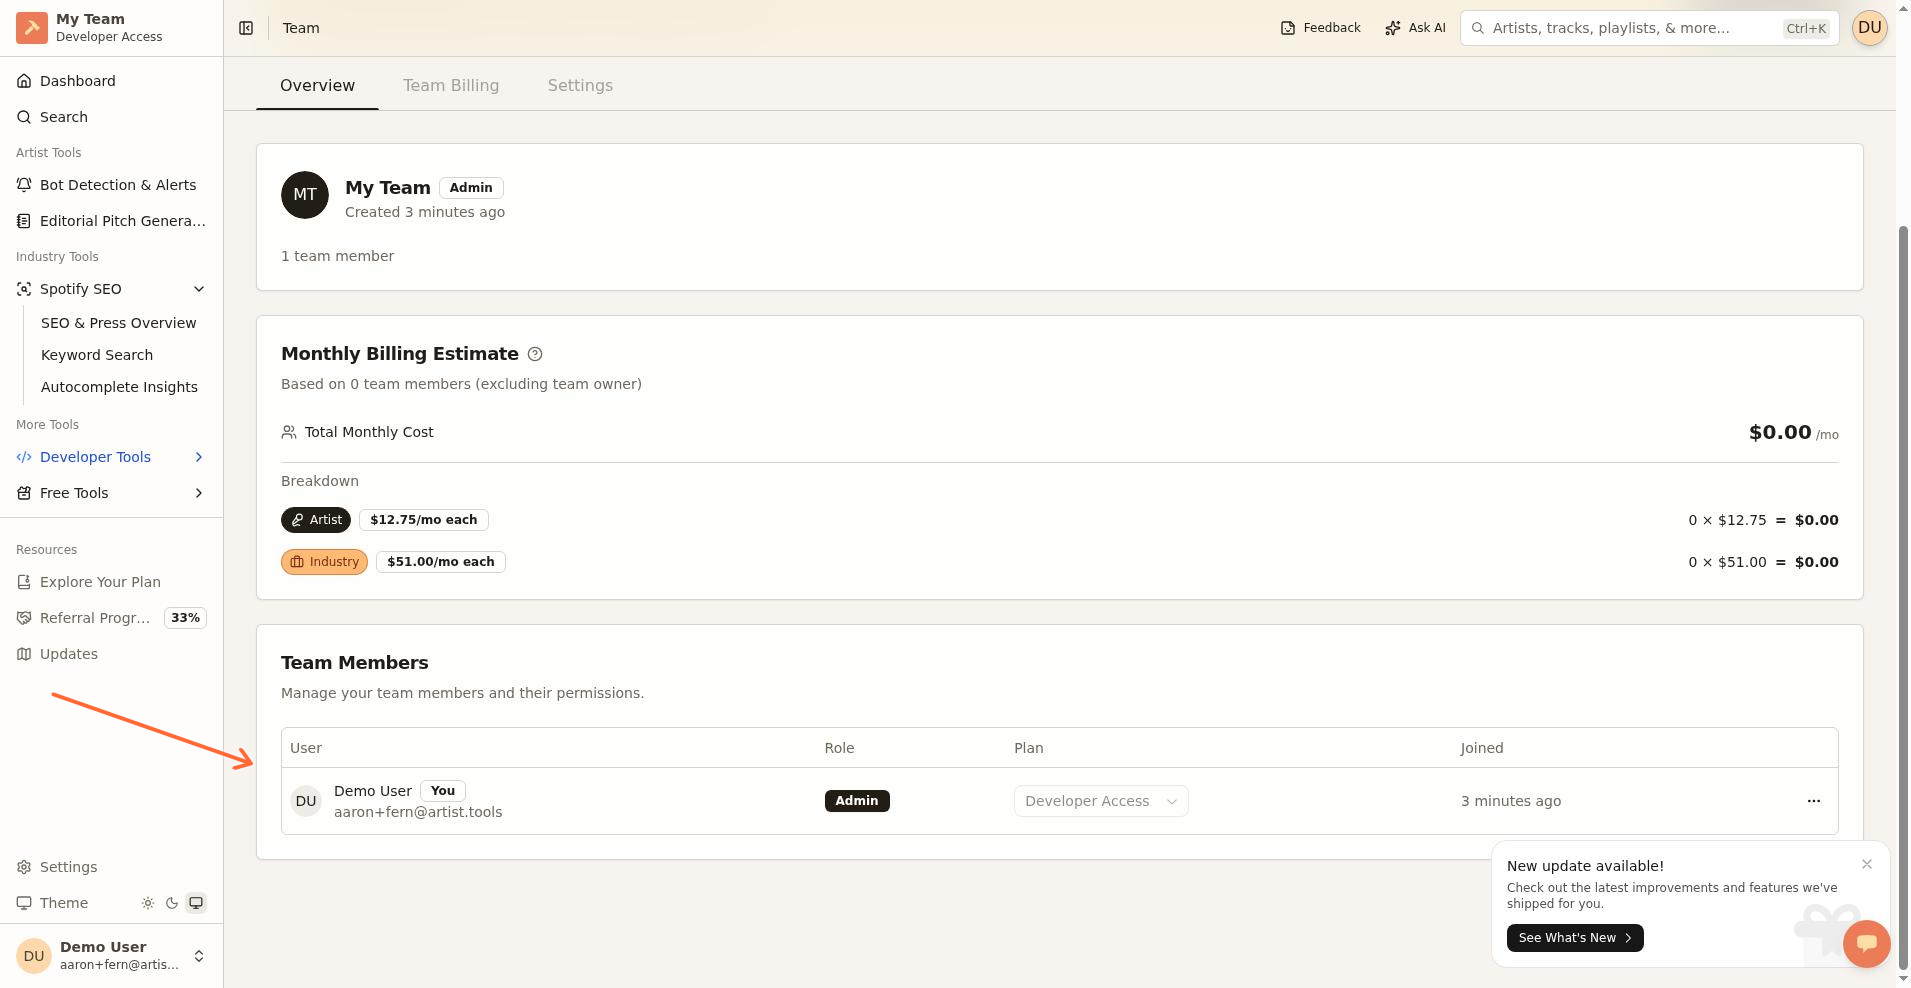
Team Members – Displays all team members in a table with columns: User, Role, Plan, and Joined. The current user row gets a You badge.
Team Billing Estimate (Admins only) – Shows the estimated monthly cost
Team Billing Tab (Admins Only)
Team administrators see the Team Billing tab, which redirects to the Stripe billing portal. The tab shows Billing is managed by your team and Use team billing to manage seats, payment methods, and team subscription details. Non-admins see Contact your team owner or admin for billing changes.
Settings Tab (Admins Only)
Administrators can update the team name, manage billing, and delete the team.
Member Management
Removing a Team Member (Admins Only)
Navigate to the Overview tab on your Teams dashboard
Locate the member in the members list
Click the Remove button next to their name
Confirm the action
Changing a Member's Plan (Admins Only)
Administrators can change a member's access level from the members list. Plan changes are prorated and adjustments appear on the next invoice.
Leaving a Team (Members)
Non-owner team members can leave a team from the Overview tab:
Go to the Overview tab
Find your own entry in the members list
Click the Leave Team button
Confirm your decision
User Roles and Permissions
Team Accounts have three distinct role levels:
Team Owner
Created the team and has full administrative access
Can invite and remove members, access all tabs, update settings, and delete the team
Can promote other members to Admin status
Cannot leave the team (must delete it or transfer ownership)
Team Admin
Can invite and remove other members
Can access Team Billing and Settings tabs
Can update team name and manage billing
Cannot delete the team
Team Member
Can view the Overview tab only
Can see team information and the members list
Can leave the team
Cannot invite members, access billing, or change settings
Cannot remove other members or change plans
Troubleshooting Common Issues
Payment and Billing Issues
Symptom | Cause | Resolution |
|---|---|---|
"Your team still needs a valid payment method" | Incomplete billing setup | Click the link in the banner to complete Stripe payment setup |
"Team payments are suspended" | Payment method failed or expired | Go to Team Billing tab and update your payment method |
"You need to resolve payment issues before inviting team members" | Team billing is incomplete or suspended | Visit the Team Billing tab to resolve payment issues |
Invite button is disabled | Payment issues or insufficient permissions | Check payment status and ensure you're an Admin |
Invitation Issues
Symptom | Cause | Resolution |
|---|---|---|
"Invalid or expired invitation" | Invitation link is older than 7 days | Request a new invitation from your team administrator |
Cannot access invitation page | Not logged in or wrong account | Log in with the email address the invitation was sent to |
Invitation acceptance fails | Team payment issues or network error | Contact the team owner to verify billing status; retry after a moment |
Access and Loading Issues
Symptom | Cause | Resolution |
|---|---|---|
"Access Denied" on invite page | Not an administrator | Only Admins can invite members; contact your team owner |
"Failed to load team members" | Network issue or server error | Click the Retry button or refresh the page |
"Failed to check payment status" | Temporary API error | Refresh the page or try again in a few moments |
Cannot see Team Billing or Settings tabs | Member role (not Admin) | These tabs are visible only to Admins and Owners |
Limitations and Known Behaviors
Beta Status: As a Beta feature, Team Accounts may experience occasional instability
No Bulk Invites: You must send invitations one at a time
Plan Restrictions: Only Artist Access and Industry Access plans can be assigned to team members; Developer plans are not available
Single Team Per User: Users can only belong to one team at a time
Proration Only: When joining a team, existing subscriptions are automatically canceled and prorated
No Guest Access: All team members must have artist.tools accounts and be logged in
Invitation Expiration: Invitations expire after 7 days and cannot be extended
Payment Dependency: All team features require a valid payment method; suspended payments block most administrative actions
What's Next
Billing and Payments for invoice management
Account Settings for individual preferences
Pricing Page to understand plan differences
Getting Help
If you encounter issues with Team Accounts, gather the following information before contacting support:
Your team name
The specific error message you're seeing
The email addresses involved (for invitation issues)
Timestamp of when the issue occurred
Your role in the team (Owner, Admin, or Member)